Tag Archives: stampin up

Birthday themed challenge card

Stampin up celebrate today soft sky crushed curry

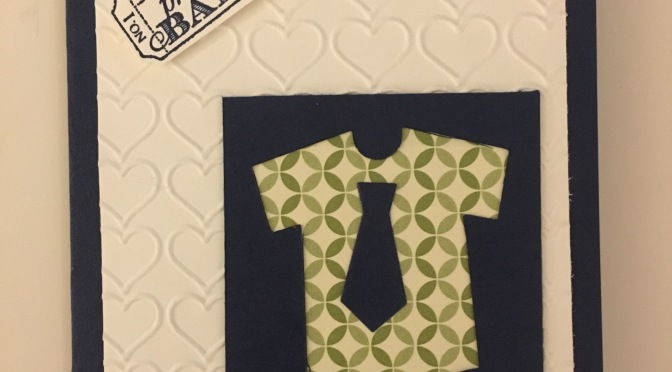
This is only my second ever crafting challenge – here for the Girls Gone Wild Weekend Challenge. Here was the sketch

February-12-2016-232x300

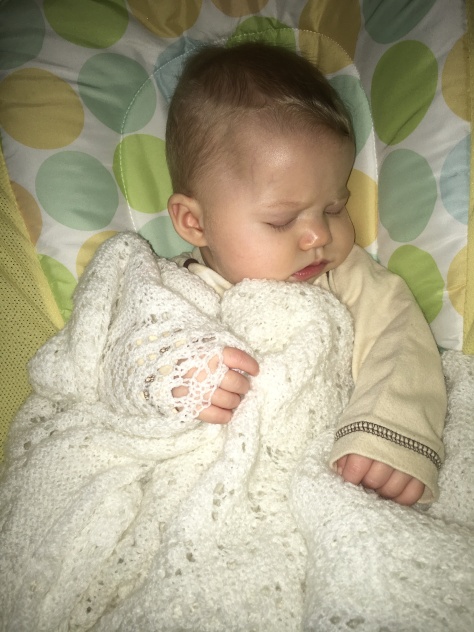
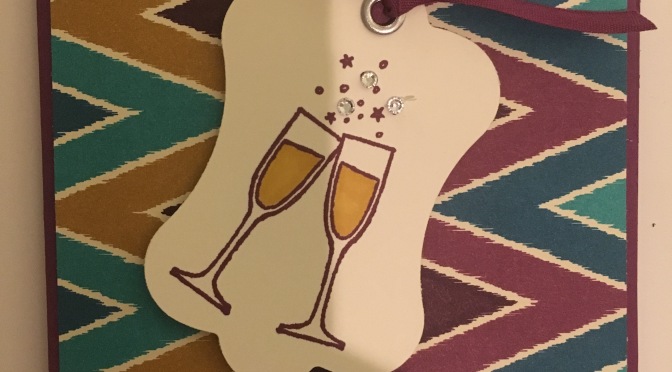
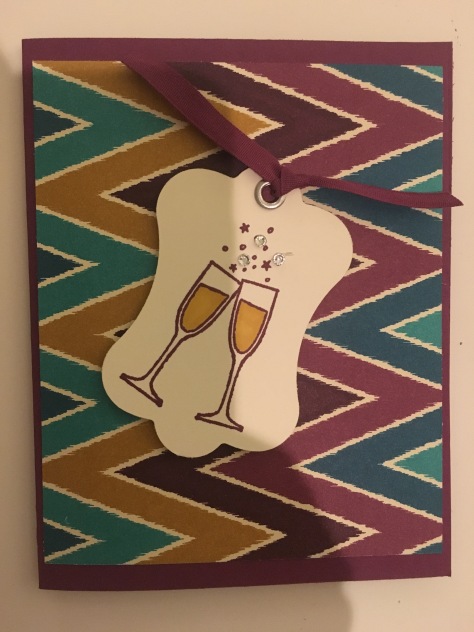
which is quite a classic. I liked that the post encouraged you to think about what you saw in the circle – they had a rabbit in one of theirs. I decided it made me think of a balloon (not terribly creative, but not exactly a circle either) and this cheerful card popped out while my little ‘uns were sleeping (a coordinated nap time – I couldn’t believe it!). I didn’t have long as we had to wake them up early for a 5 pm showing of ‘Peppa Pig Live!’ – UGH. While it was fun to see my toddler get really into the show, I couldn’t get out of there fast enough. Away from the screaming (excitement) and crying (tantrums – not my son thank goodness) and high squeaky voices and back into my very peaceful craft room. Phew.

IMG_6077

I am also pleased that I used my aqua painters for the first time – it was really easy to get a watercolor effect with no skill. I had hoped to create something reminiscent of sky… not sure I did, but glad I tried because I liked the end product.

The cleaning lady comes in tomorrow instead of her usual Tuesday spot – this means NO CHORES tomorrow night. If the kiddos comply (Yes, I am still wrapped around their schedules a bit, but that is because Caroline is only 4 months!) I might get to participate in “Make it Monday”. Keep your fingers crossed for me 🙂

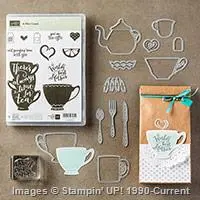
Tool box (less the Best day Ever DSP which is retired):


Teacher Valentines Card

A nice cuppa stampin up

I had planned a crafty evening, and my three-year old complied by going to bed early without a fuss… my 3 month old is going through a growth spurt and had other ideas. She’s a great sleeper, just not when she is hungry. As I try not to give her bottles when she is with me, and my milk supply isn’t great, the upshot is that feeding can take a while… cutting into my precious crafting time :-0

I finally sat down at 8.15 pm, and I pump milk at 9.30, so Sam’s teacher Valentines had to be quick and easy… For Christmas the teachers got a mixing bowl with muffin mix, a whisk and the sign “We whisk you a Merry Christmas”. I thought the Cake Boss bowls were the cutest so I am giving the teachers a matching Cake Boss mug filled with teabags and a sign “I love my “tea”cher”. [geddit]. So for the cards, “You are “tea”riffic” seemed cheerily appropriate.

IMG_5805

Plus, I am British so it works. And I made 10 cards (2 children * (3 teachers + 2 morning supervisors)) in an hour. Nice. The pearls are my favorite part 🙂

Supplies:

Toolbox:

OK, it’s 11,44 pm and Caroline generally wakes to feed at 1. Boy, am I going to be tired tomorrow. She’s too cute to be mad at though.

IMG_5773

Easy Class Valentines

IMG_5779

My wonderful upline had a wonderful idea! The quickest and easiest class Valentines treat ever. Just take a piece of paper 6″ x 1.75″, and score vertically at 2.5″ and 3.5″.

JPEG image-5982D1A9EFAF-1
Fold up, add a bow – et voila! A candy holder. I made a little matching tag with “Love from Sam -x-” on the back. 21 Valentines day treats, waiting to be stuffed with candy, in 35 minutes, for less than $4. Not bad, and fun to make!

IMG_5780

Check out my upline’s series of other Valentines candy holders here! She even gave me the ribbon, and someone in the class “loaned” me their Valentines paper stack as I had forgotten to order any. What a lovely group.


Supplies (with a different stamp set which came from paper Pumpkin in January 2015!).

Celebration card

IMG_5498


A quick and easy template – like a 3D tag on some DSP – is good to have as a go to. Here the bold colors make it stand out a little, and the bling made it feel a little more special. I love Rich Razzleberry.

Two quick and easy cards 


Quiet crafting time is a rare entity these days – it requires coordinating 2 nap times and then ignoring everything that still needs to be done after a hectic week (I’m back at work full time after dropping off Sweet Caroline at daycare – sob). So when I found a quiet hour today I poured myself a huge cup of the in my Emma Bridgewater teapot, lit a scented candle and got down to it. These two cards were super quick and easy to make, but they are some of my favorites of late. I bought the bicycle stamp set off my upline – think she’ll regret selling it now?

It was a lovely break in the madness

Friendship / Thank you card

mossy meadow lost lagoon blackberry bliss stamping up butterflies flowers


I participated in my first craft challenge. Fab Friday challenged us to use three strong colors in one:

Link love July 31_4


which was daunting for me, as I have been focussing too much on 2-color cards, and on classic pastel / light colors. Furthermore, I had only one hour to complete this as I had promised my husband I would squeeze in an episode of True Detective between putting the toddler down, making the challenge and going to bed (I need to be in bed by 10,30, yawn!).

Using something strong was fun, I added in Rich Razzleberry to give some relief to the Blackberry Bliss, and although you cannot see it too well, those are pearls on the centers of the flowers and down the middle of the butterfly.


Tool kit (all available from my Stamping’ Up! store):


IMG_0844


I am so glad I entered this challenge – it really made me try something new, and I am pleased as punch (yup, little bit of a pun intended) with the output. Definitely going to try more challenges!

As ever, if you don’t want to make it, you can always pick it up from my Etsy store.

Happy Stamping!

Birthday card for a 2 year old.

IMG_0809

This weekend my son was invited to his friend’s second birthday party – he definitely had an awesome time at her ‘Bubble Guppies’ themed do and enjoyed playing with a whole new set of toys.

Off to the party - my son in his snazzy hat
Off to the party – my son in his snazzy hat

I made a very simple card for her birthday – making something ‘child friendly’ (especially so young) was new to me, but I figured it would be a fun challenge. I am trying to challenge myself to a card a week!

Tool kit (all available from my Stamping’ Up! store):

Other tools:

Assembly:

Stampin up stars little buddy birthday card


Again, super easy assembly, all you need to know is that my two pieces of DSP were cut at 4.5″x1.5″ and 3.5″x1.5″; and the DSP was cut at 1/2″ bigger all around (5″x2″ for one piece; 4″x2″ for another).

The basic card is, as usual 8.5″x11″ paper, cut in half (8.5″ x 5.5″) and folded at 4.25″ – final card size 4.25″ x 5.5″.

stars stamping up birthday card

As ever, if you don’t want to make it, you can always pick it up from my Etsy store.

Now, I although I followed my last goal and went for more color, I still need to break away from 2 dominant colors… next time perhaps.

Happy Stamping!

Friday link love

2 links from this week’s reading…

I just discovered Buffy Cooper’s “Stamping with Buffy” blog – she posts daily! I am in awe. This week, Buffy had tonnes of lovely ideas, but I wanted to share her “Winter Moon” card because it had such a different feel from everything Stampin’ Up! right now. Maybe because it is summer, or perhaps on the back of the 2012-2014 In Colors which were pastels, I am seeing a lot of cute, summery cards. This was a beautiful change:

moon

I am also showing some link love to my Stampin’ Up! upline, Janice, who has started posting over at JB Stamper.  Check out what Janice does with her Paper Pumpkin:

paperpumpkin-2015-june-c2a9

I can’t wait to show you more  of her creations (I get a preview in class!).

Have a lovely weekend – I have a bust one planned, but I am trying to make a new card each week, so hopefully I will have something to post soon…

Elegant Baby Shower Card for a Girl

Stamping' Up!  Baby shower card

Today I created a super simple baby shower card. I love the cutesy animals in the current sets, but I wanted to create something a bit more elegant for mother having her fourth baby very soon. So, I stuck to colors one of which was crumb cake, and whereas I would usually put little feet or booties across the bottom, I went for butterflies. It gives the card a slightly different feel. But, as with last weeks’ card, it is extremely easy.

Tool kit (all available from my Stamping’ Up! store):

Card stock in crumb cake
Card stock in another color – I used Primrose Petals, which has been retired, but melon mambo would make a great alternative (or Pool Party for a boy / Smokey Grey for gender neutral?).
Ink pad in color 2
Decorative Dots embossing folder (I ummmed and ahhhhed about whether or not to use dots or stars, and honestly, my next order is going to contain a Happy Heart embossing folder for baby shower cards)
Papillon Potpourri Stamp set
Bitty Butterfly Punch
Elegant Butterfly Punch
Bitty Banners stamp set, (This has been discontinued but I think it would look cute to write a message)
Bitty Banners Framelit dies
Pearl Basic Jewels

Other tools:

Assembly is really easy. Just cut out the follow parts (I made the crumb cake embossed background 4″ x 5″) and stick together, adding pearls as embellishments (or rhinestones for added glamor):

Stampin' Up! Butterflies

As ever, if you don’t want to make it, you can always pick it up from my Etsy store.

Happy Stampin’!

Simple “You are a Star” card

IMG_0595


This card was a “last minute” easy make and makes a great starter project! It was designed for someone I worked with, and really admired, who was leaving and moving on bigger and better things. However, it would be great as a graduation card, any exams passed card, or even a “cheerful random message” card.

This is so easy that no special instructions are needed – just construct each piece and assemble. If you do not have a big shot, in place of the textured blue background, think about using Pool Party pics from the Subtles designer paper pack – it will give a very similar effect.

And ignore the messy right hand side edge – I have to correct that and edit this post 🙂

IMG_0526

Tool kit (all available from my Stamping’ Up! store):

Other tools:

Of course, if you don’t want to make it, you can always pick it up from my Etsy store.

Happy Stamping!